Getting started
Your first export
Export a page with its media and the homepage setting, in under a minute.
This walk-through exports one page — say, the homepage — with its images and the settings that make it the homepage, then imports it on another site.
1. Open Tools → Export
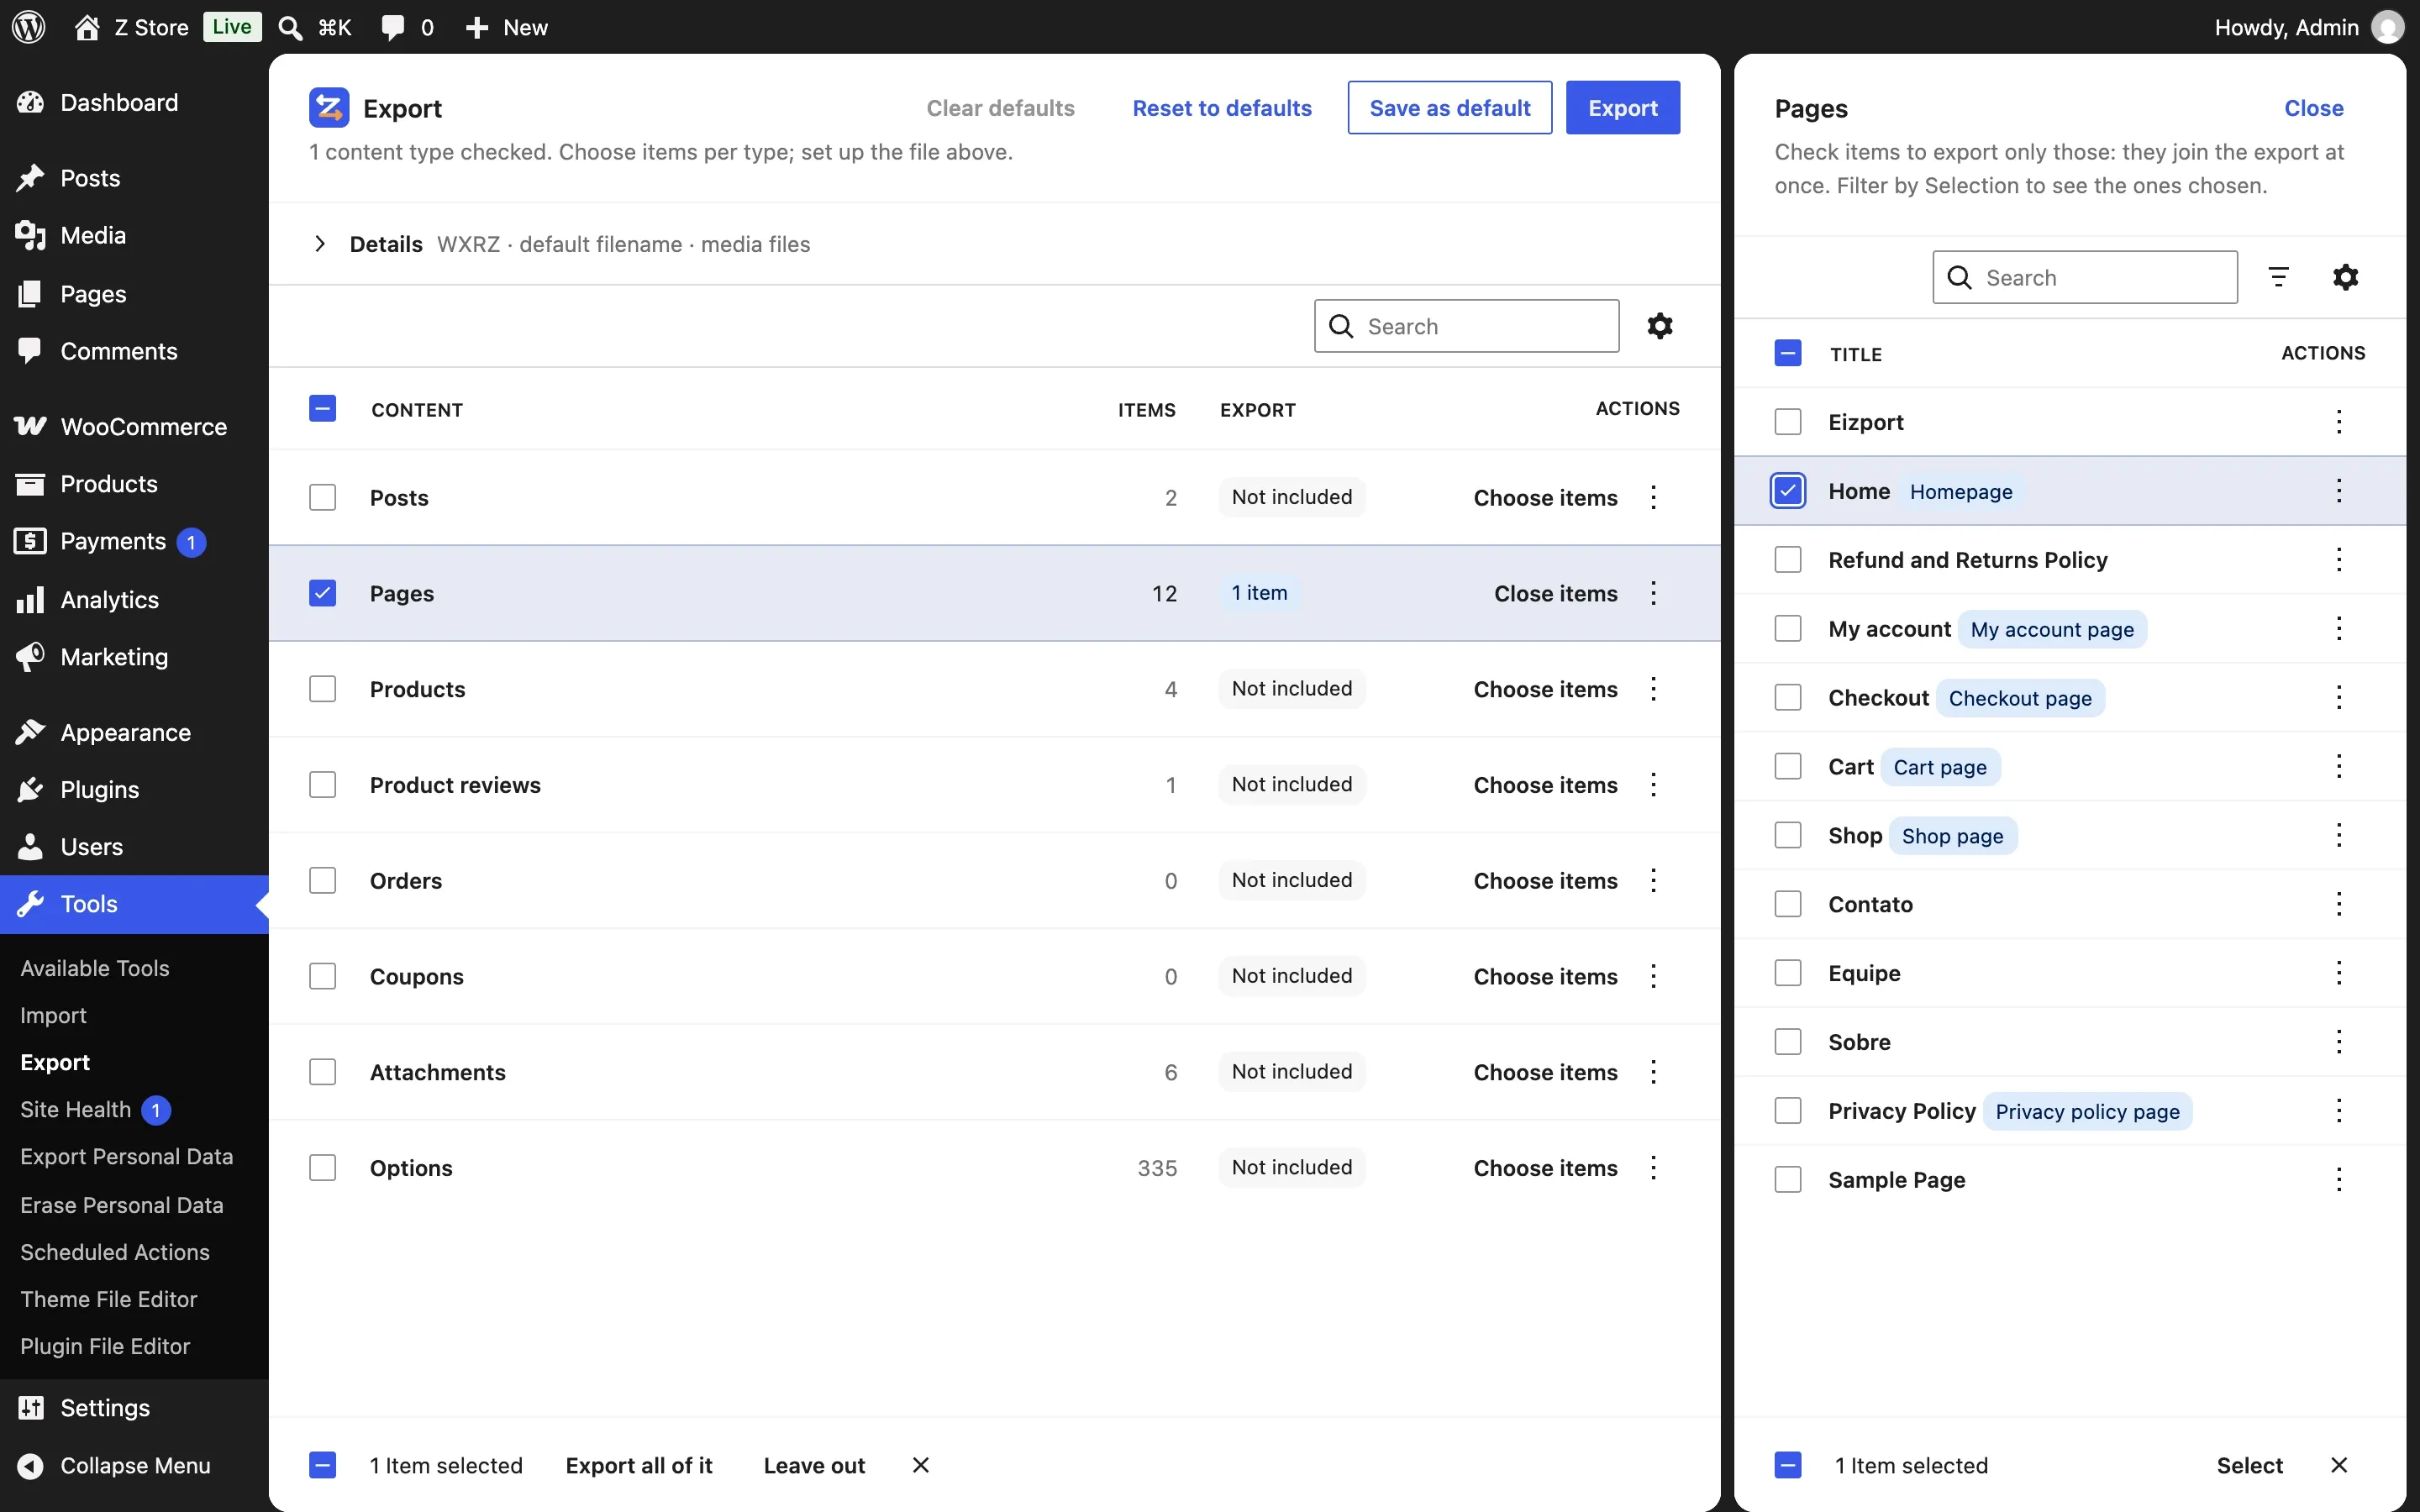
The Export screen lists what can be exported: each content type (Posts, Pages, Products…), Attachments and Options. Nothing is checked yet, which means everything.
2. Choose the page
Click Pages (or Choose items in its row). A side panel lists the pages with a checkbox each. Check the homepage — it shows a Homepage badge: the Pages row says 1 item at once. Click Close.
The Options row now says 2 suggested: page_on_front and show_on_front point to the page you chose (linked settings). Check the row and they come along — it still says 2 suggested. If the homepage shows products with a WooCommerce block, the Products row suggests them the same way.
3. Check the file
The Details line above the list sums up the file — WXRZ · default filename · media files. Click it to open its settings:
- Format reads WXRZ: a bundle, because media files and settings go with it.
- Media files is on: the page’s attached images, its featured image and the images in its content go inside.
- File name is empty: the file gets WordPress’s usual name, shown as the placeholder.
4. Export
Click Export. The file is written as a copy on the site and a notice offers Download.
5. Import it
On the other site, go to Tools → Import — it opens the WordPress Importer — upload the .wxrz and run the importer as usual. Or export with As plugin on, install that .zip as a plugin and click Run import on its screen (as plugin). The page, its images and the homepage setting arrive together — with the new page’s ID in page_on_front.
The old site doesn’t need to be online: the images come from the bundle.